Wednesday, December 14, 2011

Brownie Bon Bon

I know I wrote about brownie bon bons before, but they are such an easy, yummy treat to make.  I made them as part of my goody boxes for Christmas.  I know everyone makes cake pops these days, but brownies are so much yummier.  A chocolate covered brownie bite, uh ya. 

One box brownie mix (you all must know how I feel about Ghirardelli's by now), a bag a chocolate chips.  Boom.  Done.  (No, I'm not from Jersey, it just seemed appropriate). I added some crushed candy canes (left overs from my hot cocoa dippers), to be festive.

Tuesday, December 13, 2011

Hot Cocoa Dippers

I am so crafty this season, Martha Stewart would be proud.  I'm determined to make goody gift boxes for my friends this year, and yes I even got crafty on the boxes.  Today I got started with Hot Cocoa Dippers and Melted Snowman Sugar Cookies.  The snowmen won't be done until tomorrow, so for now I will write about the dippers.

All you need are marshmallows, candy canes, chocolate chips, and sprinkles.  
Break the candy canes so that they are just a stick. 
Push broken side into marshmallow. 
Heat the chocolate chips until almost melted, stirring until completely smooth that way the chocolate is not too thin and hot. 
Dip marshmallow into chocolate.
Sprinkle!
I let mine dry in a wine glass so that the chocolate wouldn't get smudgy.  As long as your chocolate isn't too thin when you dip it, it won't drip.

Monday, December 12, 2011

Santa Hat Brownies

First let me just say that 'pinning' is killing my creativity.  There is just too many cute things on there, why would I ever need to come up with my own ideas?  The Santa Hat Brownies were so cute I had to make them.  And so easy!  I used a box brownies (I know shame on me, but I just did my huge pile of dishes I didn't really want to make a million more.  Plus Ghirardelli is just so darn good, why mess with perfection?) I also made a cream cheese frosting, have I posted that recipe?  It's pretty delicious. 

Cream Cheese Frosting

Mix in standing mixer:
1/2 cup + 3 tbl butter
1 cup powdered sugar

Cream together until smooth and creamy

Add:
1 lb (2 boxes) softened cream cheese

Add:
lemon juice
vanilla bean paste

I just add a healthy squirt of lemon juice and vanilla bean paste (about 1 tbl each) to the mix and keep adding until it tastes just like cheesecake


Sunday, December 11, 2011

Under Construction Snowman

The local Construction company had their Christmas Party last night & I got to make their cake.  She wanted a whimsical Christmas scene that also involved construction.  So I made a giant snowman that the construction workers were building.  Cute idea right?  I was so excited to make it even though I had no idea where to even begin.  I seem to have this problem of coming up with all these grand ideas and then being a complete stress ball for a week trying to make it happen. Some times I forget I'm not a professional cake maker.  I had a lot of problems with this cake but in the end I was actually happy with the result.
Now I'm gonna post a pic of the finished result, but I have to admit I made a total rookie mistake, that I know better then to do, but for some reason I completely forgot to put proper support under the head, let's just blame that on prego-brain.  So the next day the body started to sag and bulge from the weight, which makes the fondant to tear (easy enough to hide with decorations), but also to change the shape.  But I thought ah well, snowmen aren't perfect ball shapes anyways.  I also have to say that it looked better in person, the camera just accentuated all the flaws.  Okay disclaimers over.....
In case your thinking 'what is she talking about, that snowman is perfectly cute'.  Let me just post a pic of it when it was a work in progress.

See what I mean?  Still, I love the idea, and all problems aside, I love this cake.  I think the little workers carrying the chocolate arm is one of my favorite parts, and the rosy cheeks.
  MERRY CHRISTMAS EVERYONE!

Wednesday, December 7, 2011

Hot Buttered Rum Frosting

I had a stroke of genius last night and of course it involved buttercream.  I tested the recipe this morning and with just a bit of tweaking, it came out awesome!
I started with my Italian Buttercream recipe, which is basically adding a simple syrup to a meringue, then adding butter to it all.  This time I used a brown sugar instead of white, and spiced the butter with plenty of cinnamon, nutmeg, crushed cloves, and a bit of salt.  At the end I added vanilla bean paste and rum extract.  I'd use the real thing except my liquor supplies are pretty low these days. 

2 cups brown sugar
1/3 cup water

1 tea cream of tartar
5 egg whites

3 cups butter, mixed with:
6 tea cinnamon
3 tea nutmeg
1 1/2 tea crushed cloves
1 1/2 tea salt

1 tbl vanilla bean paste
rum or rum extract to taste (I used about 1 tbl)

Mint Chocolate Crinkle Cooies

Okay, I slacked for a bit with Halloween and Thanksgiving, but I'm feeling a bit more myself and there's just too many cute and delicious things to bake for Christmas that I had to get baking.  I thought I'd start with something simple.  Mint chocolate crinkle cookies.


Here's what you need:

1 cup unsweetened cocoa powder
2 cups sugar
1/2 cup veg oil
4 eggs (room temp)
2 tea van extract
2 cups flour
2 tea baking powder
1/2 tea salt
powdered sugar

Here's what you do:

Mix together cocoa, sugar, and oil.
Beat in eggs one at a time.
Stir in vanilla.
Combine flour, baking powder, & salt.
Add to cocoa mixture.
Stir in chips.
Cover dough, refrigerate at least 4 hours.

Pre heat oven to 350.
Line cookie sheet with parchment paper.
Roll dough into balls about 1"
Coat each ball in powdered sugar
Bake approx 8 min
You want the cookies to be a bit gooey still when you pull them out.  Let the cookies cool completely and they will be like a brownie.  I over baked mine a bit the first time, but everyone at my boyfriend's office still loved them, so you really can't go wrong, but I prefer mine a bit more brownie-like, less cake like. 

Friday, October 28, 2011

My Little Pony Cake

Right now pretty much everything makes me want to vomit, (why I'll go ahead and let you guess), sadly this includes cake and frosting.  But when a friend asked me to make her step-daughter's My Little Pony Cake I couldn't resist.  It turned out so cute, I'm glad I did it, even if I couldn't quite look at it until it was covered in fondant. 

Happy Birthday Adalynn!

Thursday, September 22, 2011

Samoa Cupcakes

I Love girl scout cookies, especially the Samoas.  They are so sweet and salty and pretty much awesomeness.  I saw a recipe for Samoa cupcakes and it was love at first sight.  Here they are, my newest obsession....
After making these I had to run to the store, okay I'll admit it I went to go buy some chocolate syrup, I had destroyed my kitchen while making these and was out of pans, bowls, everything and was much too lazy to actually wash any dishes.  Annnnnyways, the point being when I walked back into my house it smelled like a big-ole box of Samoa Cookies.  Heaven. 

Cupcakes:
Mix together in large bowl:
2 cups sugar
1 3/4 cup flour
3/4 cup cocoa powder
1 1/2 tea baking powder
1 1/2 tea baking soda
1 tea salt
Add:
2 eggs (room temp)
1 cup milk (room temp)
1/2 cup veg oil
1 tea vanilla
2 tea coconut flavoring (I used coconut emulsion)
Mix well then fold in:
1 cup packed coconut
Add:
1 (scant) cup boiling water
Bake 325 until done

Buttercream:
I used vanilla buttercream recipe (minus adding the vanilla)
add approx 2 tbl caramel to every cup of frosting

Top each cupcake with some toasted coconut, a drizzle of chocolate sauce, and a tiny sprinkle of salt.


Saturday, September 10, 2011

A Scuba Diving Cat!

My friend's daughter is turning 7 and when her Mom asked her what kind of party she wanted she said 'a scuba diving cat party'.  So here ya go a scuba diving cat cake...


The bottom cake is a chocolate cake with peanutbutter & chocolate ganache and a butterfinger buttercream.  The top is a something a bit lighter; hot milk cake with a raspberry meringue buttercream

Sunday, September 4, 2011

Kodiak Cupcake Wars!

This weekend was Kodiak's first Cupcake Wars.  The theme was Fall Harvest.  I decided to enter two cupcakes; Carmel Apple Cupcakes with a vanilla meringue buttercream & a Pumpkin Cream Cheese cupcake decorated as an owl. 


While the owls were super cute, the Apple Cupcake recipe won 3rd place!

Here's the winning recipe:

Apple Cake:
(enough for exactly 12 cupcakes)

3 apples, peeled, cored cut into smallish chunks, I like my cake a bit chunky.  I varied the size
Toss apples in:
1/2 TBL Cinnamon
2 1/2 TBL sugar
Set aside

Sift together:
1 cup + 1/4 cup + 1/8 cup flour
1/2 TBL baking powder
1/2 tea salt
Set aside

Whisk together:
1/2 cup veg oil
1 cup sugar
1/8 cup orange juice (room temp)
1 1/4 tea vanilla
2 eggs (room temp)

Add dry ingredients

Layer in cupcake:
batter, apples, batter, apples

Bake 350 until done.  Will still look very light on top, careful not to over cook.  Done when push on cake and it bounces back.

Fill cupcakes with Carmel.  I used premade Old Fashion Carmel apple dip.  The kind you find in the produce section by the apples.

Top with vanilla meringue buttercream:
Add:
2 cups sugar
1/3 cup water
Cook over med heat.  Clip on candy thermometer

Place in bowl of standing mixer with whisk attachment:
5 egg whites (room temp)
1 tea cream of tarter
Mix on med until soft peaks form

When sugar gets to 248 degrees turn mixer to slow and SLOWLY and carefully (it is very hot) add to egg whites

Once all added turn to high.  Mix until cool to touch (60-70 degrees) About 10 min.  Very important not too warm when adding butter.

With mixer on med add 3 cups unsalted butter (room temp) one TBL at a time make sure completely blended in until adding more.

If frosting gets soupy or starts to break turn to high and keep adding butter.

Add about 1 tea vanilla bean paste.

Monday, August 22, 2011

Hot Milk Cake Lemon Buttercream


This was my first attempt at a Hot Milk Cake.  It tastes a bit like angel food cake.  Very light, fluffy and sweet.  I frosted it with a lemon buttercream.  To make this I added 3 tablespoons of home made lemon curd to every one cup of vanilla buttercream.

The hot milk cake recipe I got from my newest favorite book: Miette

This cake is for my boyfriend's mom's birthday.  Happy Birthday Donna!

Tuesday, August 16, 2011

S'more Pie please!

I found a recipe on http://www.justataste.com/2011/07/smore-pie/ for a smore pie that looked so good I had to make it.  I have to admit the first attempt did not turn out so great.  While the chocolate part was fantastic, the marshmallow part was a bit...hate to use this word on a food blog but, snotty.  Eeeew, I know.  I didn't give up hope.  I had made marshmallows before, so I used that recipe to make the top part.  Here is my adapted recipe.  It is rich, creamy, fluffy, sweet, ooey, gooey and just summer-lovin good!  It'll have every body asking for S'more Pie please!  (I know, I'm a bit of a nerd, I can't help it)

S'More Pie


Ingredients:

Chocolate filling
1 nine inch pre made graham cracker crust, or make your own
1 cup bittersweet chocolate, (not more then 70% cacao) I don't have the greatest selection here, but I often use Ghiradelli's dark chocolate 60% cacao chips
1 cup heavy cream
1 large egg, room temp
Marshmallow:


  • 1 1/2 packages unflavored gelatin


  • 1/2 cup ice cold water, divided


  •  3/4 cup sugar


  • 1/2 cup light corn syrup


  • 1/8 teaspoon kosher salt


  • 1/2 teaspoon vanilla paste


  • I scaled this recipe down as much as I could, you will still have some left over, store in an air tight container at room temp.  Ooh, I see some rice krispy treats in my son's future.

    Directions:

    Unwrap the pie shell and place it on a cookie sheet.

    Preheat the oven to 350ºF.

    First make the chocolate filling by placing the chopped chocolate in a large bowl.

    Bring the heavy cream to a boil in a heavy saucepan then pour it over the chopped chocolate and let it sit for 1 minute.

    Whisk together the chocolate and heavy cream until it's thoroughly incorporated and smooth.

    Gently whisk in the egg and a pinch of salt until combined then pour the mixture into the prepared pie crust (it will be about half full).

    Cover the exposed crust with a pie shield or foil.

    Bake the pie for 20 to 25 minutes, just until the chocolate is mostly set but slightly jiggly in the center.

    Allow the pie to cool on a rack for one hour while you make the marshmallow topping.

                                                         MARSHMALLOW TOPPING:

    Place the gelatin into the bowl of a stand mixer along with 1/4 cup of the water. Have the whisk attachment standing by.

    In a small saucepann combine the remaining 1/4 cup water, granulated sugar, corn syrup and salt.

    Place over medium high heat, cover and allow to cook for 3 to 4 minutes.

    Uncover, clip a candy thermometer onto the side of the pan and continue to cook until the mixture reaches 240 degrees F.

    Once the mixture reaches this temperature, immediately remove from the heat.

    Turn the mixer on low speed and, while running, slowly pour the sugar syrup down the side of the bowl into the gelatin mixture.

    Once you have added all of the syrup, increase the speed to high.

    Continue to whip until the mixture becomes very thick and is lukewarm.

    Add the vanilla during the last minute of whipping.

    Immediately pour the marshmallow topping over the pie. It will be loose enough to spread.

    Refrigerate the pie for one hour, uncovered, then cover it with plastic wrap that has been coated lightly in vegetable oil and chill it for 3 more hours.


    Preheat the broiler.

    Place the pie on a cookie sheet, remove the plastic wrap and cover the pie edges with a pie shield or foil.

    Very carefully rotate the pie under the burner, about 3 to 4 inches away from the flame, just until the top is evenly browned, about 3 minutes.

    Let the pie cool for 10 minutes before slicing it with a sharp knife dipped in hot water.


    Friday, August 12, 2011

    Italian Buttercream

    I am in LOVE with this buttercream.  I have been hesitant to try European buttercream because it seemed so technical and I'm more of a figure-it-out-as-you-go kind a gal, but holy crap it is so worth the trouble.  And really after I've made it a few times I'm sure it won't even feel like a big deal to make.  It is so far superior to any American buttercream you will never look back.
    It tastes like cross between whip cream and what we know as buttercream.  It is silky and smooth and light like whip cream, but tastes rich and creamy like a buttercream.
    Here is what you need:
    2 cups sugar
    1/3 cup water
    5 large egg whites (Room temp eggs)
    1 tea cream of tartar
    3 cups unsalted butter- (soft)
    1 tablespoon vanilla paste (or 2 tablespoon vanilla extract)
    Candy thermometer

    Okay, this may sound complicated but really, it's not so bad, and totally worth it.  Here's a very key tip: Make sure all your ingredients are ROOM TEMPERATURE. 

    1. Small pan over med heat, combine sugar & water.  Clip candy thermometer to side.  Cook mixture until reads 248 degrees. About 5-10 min.  Keep your eye on it!

    2.  Meanwhile combine egg whites (room temp) and cream of tartar in bowl of standing mixer with whisk attachment.  When sugar mixture reaches 240 degrees start whisking egg mixture at med-low speed.

    3. When mixture reaches 248 degrees, reduce speed to low and very slowly pour mixture into the bowl.  Try not to splatter the very hot sugar.  Once all the sugar has been added turn the mixer to high and beat until cool to the touch (not cold-cool, just barely warm if that makes sense).  An instant read thermometer would read 65-70 degrees.  This should take about 5-10 minutes (or even up to 15 min). 

    4. Once meringue cool enough (very important, if not cool enough, it will separate), begin adding butter.  Reduce speed to medium and while mixer running add butter 1 tbl at a time.  Make sure it is completely mixed in before adding more.  The mixture may deflate and begin to look curdled.  Raise the speed to high and continue adding tablespoon sized butter, making sure each one is blended in before adding more. Once all the butter is added the frosting should be smooth and thick.  Add the vanilla and mix to combine.

    5. Use it immediately, or cover and refrigerate until needed.  Store in zip lock bag for one week in fridge and up to one month in freezer.  (To thaw, leave in fridge over night, not counter).  To use frosting that has been chilled, remove from fridge and bring to room temp, about one hour or microwave in 15 second intervals, mixing in between each until soft. 

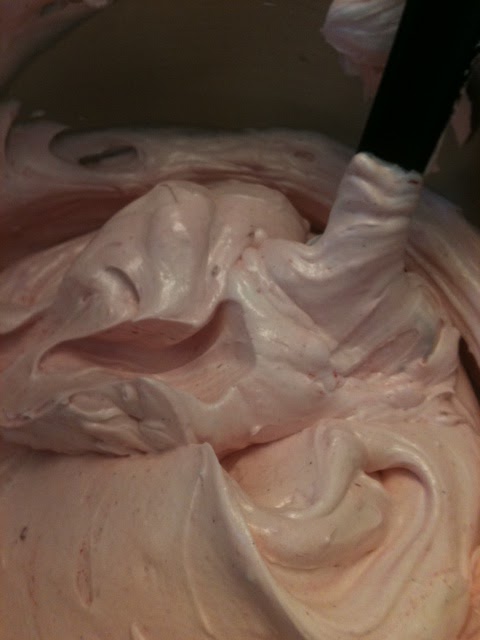
    The pic I took is of a raspberry buttercream. After making the frosting add 3 tablespoons raspberry juice to every 1 cup frosting.  It gives it a very pretty pink color with just a touch of berry flavor.

    Raspberry Juice
    2 cups raspberries
    2 tbl water
    1 tbl sugar
    Cook over med-low heat 10-15 min, until berries liquefied
    strain
    Cool to room temp before adding to buttercream


    Wednesday, August 3, 2011

    Lemon Cupcakes, White Chocolate Buttercream

    I got these super cute robot candy molds that I have been dying to try out.  Long story short, I ended up with some white chocolate ganache that may have resembled broken robots.  I didn't want it to go to waste so I made lemon cupcakes with a blueberry white chocolate buttercream


    For the buttercream I just added the white chocolate ganache to butter, cream, and (a little) powdered sugar (be careful, white chocolate is already so sweet).  To half the frosting I added a blueberry flavoring oil.  So citrusy and creamy and sweet, yummy!

    Monday, August 1, 2011

    Doughnut Pops

    Doughnuts are cute.  Doughnuts on a Popsicle stick are even cuter.  If I had some little bags and bows for packaging they would be so cute, I probably wouldn't be able to handle it!


    HOME MADE (SEMI) DOUGHNUTS:

    One can buttermilk biscuits
    lots of vegetables oil or shortening
    Cut biscuits to desired size, cut whole out of middle, slightly larger then you want.  The middle hole will fill in and get smaller when you cook them
    Heat oil in pan, it doesn't have to be enough to cover biscuit, you can flip them over.
    Test oil with small piece of dough, oil should bubble around.
    Cook each side for about 15 seconds or when get golden brown.
    Cool, frost, sprinkle, wha la! 


    Monday, July 25, 2011

    I have a logo!

    I have a new logo.  Bought a pre made logo on Etsy last night, and this morning I got my files! Check this lady out, she is awesome! http://www.etsy.com/shop/stylemesweetdesign

    I'm Ridiculous

    I was thinking I would like to get some cards made up, not that I'm looking to start up a new business or anything just yet, but it would be nice to have something handy with all  my info (phone #, email, blog address, etc) on. Which lead me to thinking; well, I'll need  a cute logo made up with my name on it, which got me thinking, (yup here's the ridiculous part); maybe I should change my blog name (AGAIN!)  Was thinking 'Sweet Treats' (is that redundant? Is there any other kind of sweet?)  Or maybe 'Sweet Designs' 'Sweets By Jen' Can you tell I'm partial to the word 'sweet'? 

    Saturday, July 23, 2011

    Race For The Cure Donation Cake

    This cake was made for a silent auction to help raise money for Race For The Cure.  The guide lines were elegant and decadent.  I made a 6" chocolate cake with alternating layers of vanilla and rootbeer buttercream.  The idea was a rootbeer float cake. 


     The stand is also part of the auction.  I was admiring a friends cake stand (she's very crafty too) one day and she told me she had made it.  The idea is so simple I almost feel dumb for never thinking of it.  This cake stand cost me about $1 to make.  It is a plate and vase found at a thrift store glued together.  Brilliant!

    Friday, July 22, 2011

    Sweet Little Cake

    I think I may be on a cherry kick.  But I needed a simple, pretty little cake I could make to take up to my in laws for dinner.  My Mom used to make this cake when I was growing up and I always thought it was so pretty.
    This is a  6" vanilla cake with cream cheese frosting and topped with cherry pie filing.  So simple and so pretty. 

    Sunday, July 17, 2011

    Happy Birthday Dad!

    My parents are visiting from California right now (yay!), it was very recently my Dad's birthday so I wanted to surprise him with a cake when he got here.  I wanted to make him a ice cream sundae cake incorporating his favorite ice cream; mint chocolate chip.  I only had a short time to figure this cake out, and no time to order any special pans or supplies, so I had to use what I had on hand.  While my boyfriend might think I have too many baking supplies, this is soooooo not true, because if I had the right pans my cake would have been more proportional and turned out better.  C'est la vie.  

    I wanted the bottom to look like a waffle cone, but it ended up looking like a giant egg on top of a saggy bowl :)

    I will try this design another time, I think it's a cute idea, but really what I'm getting to is the cake, I was really happy with how the actual cake turned out!


    The bottom layer is my Awesome Chocolate Cake recipe, which was of course super moist and awesome.  Then I made a mint chocolate chip layer. 

    I started with a boxed white mix
    added oil, water
    1 tea mint extract
    1 drop green food coloring
    fold in egg whites that have been whipped until fluffy
    fold in mini chocolate chips that have been coated in flour
    It smelled & tasted just like mint chocolate chip ice cream!

    I also made a chocolate and mint chocolate chip buttercream

    For the mint I used:
    butter
    cream
    powdered sugar
    vanilla bean paste
    mint extract
    green food coloring
    mini chocolate chips

    HAPPY BIRTHDAY DAD LOVE YA!!

    Monday, July 4, 2011

    As American As Cherry Pie!

    I couldn't let a holiday go by with out baking something, but I was short on time and hadn't found anything new or exciting to inspire me, then I remembered Cherry Pie Cupcakes.  I had always wanted to make these they are so cute and incredibly simple. 

    I used a box mix of yellow cake to save time (replacing the water with buttermilk to make a moister cake), I made a cream cheese buttercream:
    1 box cream cheese
    1 stick of butter
    1-2 tea lemon
    1 tea heavy cream
    1 tea vanilla bean paste
    1-2 cups powdered sugar
    All measurements are approximate.  When I make my buttercream I start by:
    Creaming my butter &/or cream cheese. 
    When that has become smooth I add my liquid; cream/coffee/liqueur/lemon juice, etc
    Then I add powdered sugar, about 1/4 cup at a time so not to over sweeten.
    Stop, scrape down sides, taste test.  Add more sugar/liquid/butter/cream cheese as needed. 
    Blend, stop, scrape, taste as many times a needed until it is right.

    For the cherry pie topping, I just used a can of cherry pie filling, so simple!

    I cut the tops of the cupcake off so that the cherry pie filling would not fall down the sides.
    Put thin layer of frosting on top of cupcake
    Piped standerd boarder to hold in filling and give 'crust' apperence
    Topped with cherry pie filling
    Piped a basket weave on every other one

    The result; the cutest cherry pie cupcakes that tasted like a cherry creamcheese cake, yumm!

    I was trying to finish these quickly so that I could play bubbles outside with my son, so I only made 4.  With the leftover frosting, I quickly smeared it on the rest of the cupcakes.  I'm usually a fan of the piped frosting on cupcakes, but there's something to so yummy looking about a messy cupcake don't ya think?


    Happy Fourth Everyone!

    Saturday, July 2, 2011

    Flavored Sugars

    I just bought this new book that I'm now head over heals in love with; 'Booze Cakes' by Krystina Castella & Terry Lee Stone.  They combine 2 of my most favorite thing, can you guess what they are, ah ya, they are booze, and cake (I know it was a bit tricky to guess).

    Not only are there awesome desserts, I have a feeling this blog might turn a bit into a boozy cake blog, but they also tell you how to make liqueur from home, cream puffs, marshmallow cream, even your own lady fingers (!), where were you 2 weeks ago when I wanted to make tiramisu?  (Although, I'm sticken to my pledge that Milano cookies are a fabulous substitution)

    I have big plans with this book in the next few weeks, but for now I'm starting with making my own flavored sugars, so simple, why haven't I done this already?


    Flavored Sugar:
    2 cups confectioners', super fine, or granulated sugar
    1 vanilla bean, cleaned & dried

    Vanilla: Put sugar in an airtight container, burying the vanilla bean inside.  Seal the container and store in a cool place at least one week.  It will stay fresh for up to 3 months.

    Lemon: Replace vanilla with zest of 3 lemons.  (Hmm, vanilla/lemon might be really good)

    Orange: Replace vanilla with zest of 2 oranges

    Herbal: Replace vanilla with 1/4 cup dried herbs, such as whole cloves, cinnamon sticks, or star anise

    Lavender: Replace vanilla with 1/2 cup dried lavender buds

    Wednesday, June 22, 2011

    Changin it up!

    I've realized my blog is more my love of baking, discovering that perfect recipe and of course making everything pretty, or 'lovely' and not just decorating cakes, so I thought I'd change the name to encompass more then just cakes.  So, for the thousands of readers that I have.....;) My new web address is: bakeitlovely.blogspot.com as well as my blog name. 
    
    Couldn't do two posts in a row without a picture of some delicious treat.  These are chocolate cupcakes, cream cheese buttercream, topped with a peanut butter cookie. (All recipes have been posted.)

    Tuesday, June 21, 2011

    Tiramisu my way!

    For my birthday I received, among other very awesome gifts, a very nice bottle of red wine (Black Stallion Cab from Napa Valley) from my sister and the pasta maker attachment for my Kitchen Aid from my boyfriend.  So of course I had to have a gourmet Italian night.  I made fresh fettuccine in a butter & basil sauce, prosciutto wrapped-mozzarella & spinach stuffed chicken, and sauteed brussel sprouts (I don't know how Italian that is but I love them), and for dessert- tiramisu!

    Everything turned out amazing, I might have to start selling my pasta at the Local Farmer's Market.  The wine was delicious, I'm currently enjoying it as I write this, thanks again Camille!  But the reason for this post is of course the Tiramisu.  I had to make a few substitutions, because Kodiak is not the mecca of cooking supplies, but I think they may have made it even better!  The pics I took do it no justice, so I will not be posting, but trust me you have to try it.

    This is for a small cake, you might want to double it.

    Ingredients:
    3 egg yolks
    1 1/2 tbl sugar
    8 ounces mascarpone
    3/4 cup strong coffee/espresso chilled (I used Starbucks instant Italian espresso roast)
    1 tea vanilla paste
    About 2 tbl Kahlua
    1-2 packages Pepperidge Farms Milano cookies (I only got one bag and I ran a bit short)
    Cocoa powder to dust top

    Beat yolks and sugar until thick and creamy, about 5 minutes
    Add mascarpone, beat until smooth
    Add 3/4 tbls coffee & the vanilla bean paste (I swear by this stuff, it is worth getting, especially for vanilla buttercream, makes such a difference)

    In small shallow dish add Kahlua and remaining coffee.
    Dip cookies a few seconds on each side then place in dish.  Not too long or they will fall apart!(This recipe is for a small cake, because I was just experimenting I used a small loaf pan, double recipe I would use a 9x13" pan)
    Cover with 1/2 mascarpone mixture
    Layer another layer of soaked cookies
    Top with remaining Mascarpone mixture
    Cover and chill for several hours, at least 3 hours.
    Dust with cocoa powder and enjoy!

    Monday, June 20, 2011

    A Sweet 31 Party

    I decided to host a small party with my favorite things:  sweets and champagne.  I made chocolate cupcakes with a beer buttercream (made with Deschutes dark IPA), chocolate covered strawberries, brownie bon bons, cookie pops, & my favorite peanut butter cookies topped with chocolate chunks. 

    I invited a few friends, put on a pink dress, popped a few bottles of champagne and it was a sweet success!  Thanks to all that came over and celebrated with me, I wish I could have invited more people but unfortunately I have about a 4 person max occupancy in my teeny house!

    My Son really liked my dessert themed birthday


    The peanut butter cookie and chocolate cake recipe I posted already but the brownie bon bons are AWESOME and super easy:

    You can make your own brownies, or buy a box mix, (if you decide to do the box option I highly recommend Ghiredelli's).  Make the brownies and let cool.

    Scoop or cut out about a tablespoon worth of brownie, or larger/smaller depending on how big you want your bon bons.  Mold into a ball, brownies are so moist you don't need to add anything.  Just stay away from the edge pieces, they won't make a very smooth ball.  You'll have to think of other ways of disposing of those.....there's a slim (OK, maybe extremely likely) chance I ate mine.
    Cover in chocolate.  For mine I melted semi-sweet chocolate chips with about 1 tablespoon of butter per bag of chips, and a little less then 1/4 cup heavy cream.  I wanted the chocolate to set up pretty good, so I didn't add as much cream and butter as I usually would for a ganache.

    Set on waxed or parchment paper to dry, but while wet sprinkle with sprinkles, nuts, or whatever else you want to decorate with.  I did mine some with colored sprinkles, some with a chili/chocolate sugar, and some with a citrus sugar. 

    Refrigerate until party then devour!


    Wednesday, June 15, 2011

    Happy Father's Day!

    Guys don't generally like sweets or flowers, but you know what they do like...bacon!  So here's a flower I'm pretty sure any man would like to get for Father's Day.


    Yup, bacon roses!

    They smell great, taste great, and are pretty much the coolest thing ever!

    Happy Father's Day to the best Dads I know!  Love you!

    Here's how ya do it:
    You need:

    Package of bacon, I found the longest looking strips I could
    Mini muffin pan, if you can find a disposable foil one I HIGHLY recommend getting it (easier for clean up and set up)
    Fake roses
    Pull off fake roses from stem
    Drill hole in bottom of each cup (here's where the easier set up comes in with the disposable ones, you can just poke a hole with anything sharp and don't need to get out the power tools)

    Wrap bacon around each cup, starting on the outside/widest part of the cup.  Use the cup as a mold, and just swirl the bacon around till you get to the middle.  Sorry if that's confusing.  When I found this idea online, ya that's right, sadly I did not come up with this awesome idea on my own, but the site that I found instructables.com said to roll the bacon up and place in muffin tin.  These turned out too tight almost like rose buds.  I found that if they where rolled looser and the edges almost folded out, they looked like real roses, so I used the muffin tin cup as a mold. 
    I put my muffin tin over a cooling rack and put the cooling rack on a cookie sheet (lined with foil for easy clean up), that way the grease that dripped out the bottom would drain onto the cookie sheet and the bacon roses could drain and not just sit in the oil.  I would occasionally pick up the roses to help the draining process.
     Bake in oven until your house fills with smoke and can take it no longer (about 45 minutes)
    I think a deep frier would come in very handy for this project, if you ever feel the need to mass produce.
    Once cooled just stick on rose stems that you have taken fake roses off. 

    Sunday, June 5, 2011

    Kodiak Cakes: A Hawaiian Baby Shower

    Kodiak Cakes: A Hawaiian Baby Shower: "I finished a cake today made for a Hawaiian themed baby shower. I was asked to make a cake by the soon to be (and very excited first time) ..."

    A Hawaiian Baby Shower

    I finished a cake today made for a Hawaiian themed baby shower.  I was asked to make a cake by the soon to be (and very excited first time) grandparents.  They were throwing a huge Polynesian party complete with roasted pig and asked me to make something fabulous. 
    I wanted to make her a cake that was simple, sweet and beautiful.  She gave me a picture of a Hawaiian themed wedding cake that she liked, and this is my version of it for a baby....

    The baby is made out of fondant, the flowers gumpaste (I did not make these, I chose to take the short cut and buy them pre-made), my friend and I painted them after only a few trial and errors (thanks again Crystal my crafty friend:), the shells are chocolate and the sand is a graham cracker crust crushed up (yummy!)


    I also made some mini cupcakes, some vanilla/lemon/carrot cake, vanilla pudding filled & topped with cream cheese frosting, then rolled in the graham cracker crumbs to again look like sand and topped with a little umbrella .

    Congrats again to the Pickett family!  Thank you for letting me do you cake, this might be one of my new all time favs!

    Wednesday, May 4, 2011

    Bunny Buts!

    Happy Easter!
    Carrot Cake cupcakes, with cream cheese frosting, from scratch of course!

    A Cake History

    I've done so many cakes in the past that I would like to share without having to make a whole blog about each.  So that's what this is, a bit of my cake making past.  The Baby Shower cake is a whip cream cake that I thought was really sweet.  The farm cake, birthday cake, and Mod monkey cakes are fondant.  I have to give credit to my old co-worker for the farm animals, she was an amazing sculpure artist.  I have since tried sculpting my own figurines, my first attempt: My moose! The doughnut cookies were some of my favorite, so simple yet so cute, sugar cookies with royal icing.  There are more, but that is all for now....

    My Moose!
    
    Sideways (:) Monkey Cake
    
    Mmmm, doughnut cookies


    A Burger Cake!